This has been a big week for iPhone photographers! Apple announced its newest iPhones, and you know I was watching their Event. I’m always excited to find out what Apple has added to help us take better iPhone photos, and I just finished ordering my new iPhone. If you’re doing the same, be sure to order a new case for your iPhone! The dimensions always change, and older cases won’t fit the new iPhone.📱I share my favorite one later in the post.
But with all the excitement about new cameras and new features, there’s something important I don’t want you to forget:
You don’t need the newest iPhone to take better iPhone photos.
In fact, your current iPhone probably has photography features you’re not using, or may have totally forgotten are there.
And what if you don’t shoot with an iPhone? I see you!!! Two of my favorite features are available on your DSLR or mirrorless camera. In fact, they are two of the most important features on any camera! So read on!
Here are three of my favorites.

For Better iPhone Photos, Tell It Where to Focus
See the photo above? I took it with my DSLR in the summer of 2021, six years ago. The iPhone 12 was still the newest phone at that time. One of the things I teach all my students is to choose the focus point. In other words, your camera doesn’t know what you want. If I hadn’t set the focus on the white egret wading in the water, I suspect the camera would have chosen the crab traps on the dock. This is the same no matter what camera you use! (That dock is on Tangier Island, in the Chesapeake Bay. If you ever have a chance to visit, do it! It’s disappearing quickly into the bay.)
But what about your iPhone? It’s pretty smart. When you point it at a scene, it tries to figure out your subject.
But it can’t read your mind (thank goodness!) and doesn’t always get it right! So instead of letting your iPhone decide, you be the boss! Tap the screen exactly where you want it to focus.
This is especially helpful when you’re photographing something small, when several objects are at different distances from you, or when the background is competing for attention, like in the photo above. It also comes in handy when you’re shooting a photo of a person with other people around. Your iPhone simply doesn’t know who the important person is!
It only takes a second, but now you’re making the creative decision instead of leaving it up to your iPhone.

In the photo above, the iPhone wasn’t sure what to focus on, so nothing looks totally in focus. In the photo below, I chose to focus on the tomato, and its details are clear. Best of all, because I set the focus, I could switch it to the word “Canon” in the Photos app, and then that word would be in focus, after I’d taken the photo!

Make the Photo Brighter or Darker Before You Take It
Here’s another tiny adjustment that can make a surprisingly big difference. After you tap the screen to focus, look for the little sun beside the yellow focus box. Now slide your finger up to brighten the photo or down to darken it.
Why would you want to do that? Again, it’s because your iPhone is trying to create what it thinks is a correctly exposed photograph. But it doesn’t know what you saw or how you want your photo to feel. Professional photographers often adjust the exposure, either before they capture the image or afterward, in post-processing. It’s how they put their personal touch on the scene.
Bright windows often fool the exposure, making the room and the people in it too dark. Or perhaps you’re photographing a sunset and want the sky a little darker and richer.

Or shooting a scene like the one above. The sun was hiding behind the clouds, but was still too bright. My iPhone darkened the whole image to compensate. It almost created a black-and-white photograph. But that’s not what I saw! I wanted to capture the vivid blue sky popping through the clouds. And the details on the flags blowing behind the mast of the skipjack, Wilma Lee. (The skipjack is Maryland’s official State Boat!) So I brightened the image by sliding my finger up the screen.

Remember, you’re the artist! You get to decide.
This is also something I teach all my students, no matter what camera they use!
For Better iPhone Photos, Don’t Forget About Live Photos
Do you leave Live Photos turned on? I generally do! (And, yes, if you shoot with a DSLR or mirrorless camera, this magic trick is not available… 🥺)
One of my favorite reasons has nothing to do with creating a little moving photograph. It’s because your iPhone actually captures a short period of time around the moment you press the shutter button. And that means the exact instant you captured doesn’t have to be the one you keep.
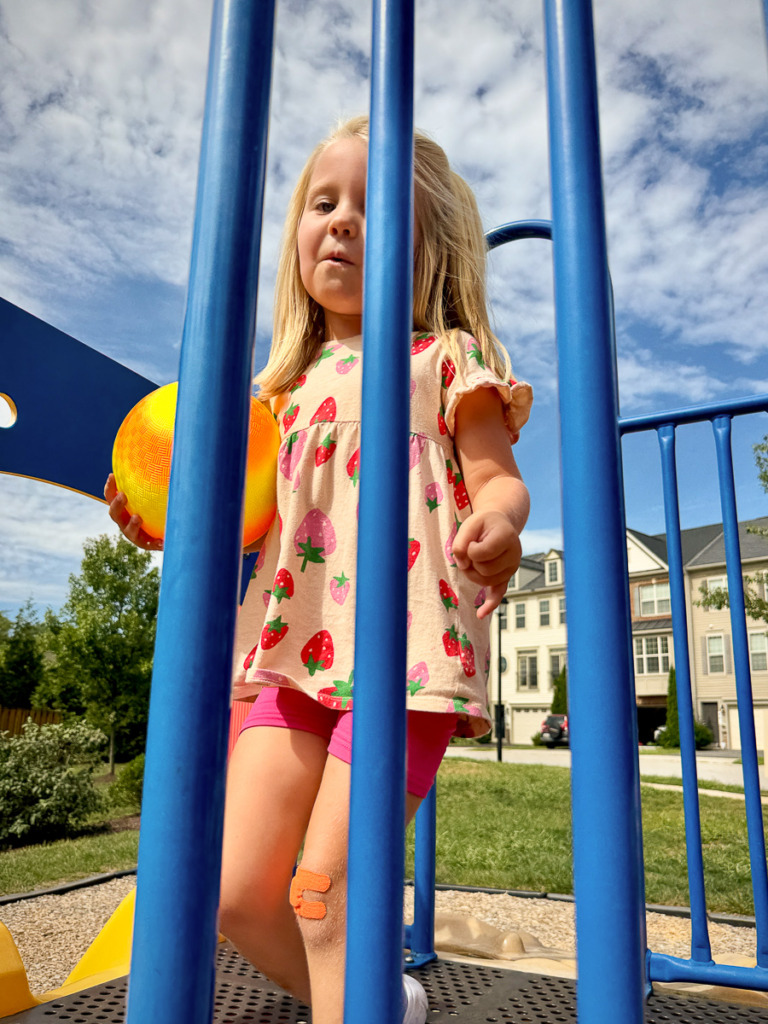
To change it, open a Live Photo in the Photos app, tap Edit, and then tap the Live Photos icon. You can move through the frames and choose a different one as your Key Photo. This can be wonderful when someone blinked, a child moved, the dog looked away, or you simply caught the moment a fraction of a second too soon or too late, as I did in the photo above.

Instead of deleting the photo, take a look at what else your iPhone captured first!
You be the judge. Which of these photos do you prefer? I love the second one! The iPhone captured it a fraction of a second before I pressed the shutter button. I was able to look through the frames of the Live Photo and make it the Key Photo instead.
Your Current iPhone May Be Better Than You Think
I’m excited about Apple’s newest iPhone. And I’ll definitely be putting its camera through its paces when mine arrives! But here’s what we all need to remember: a new camera doesn’t automatically create better photographs.
Knowing what your camera can do, noticing the light, making creative choices, and taking control of your photos will make a much bigger difference!
So before you decide you need a better camera, try these three features on the iPhone you already have.
Now It’s Your Turn
Pick one of these features and try it this week.
Try tapping somewhere else in the image to change your focus. Adjust the brightness before you take the photo. Or open one of your Live Photos and see if there’s an even better moment hiding inside it.
And if you’d like to get more from the camera already in your pocket, iPhone Photography Made Easy walks you through the features and settings that can help you take better photos without making photography complicated.
And what if you love taking photos, but don’t use an iPhone? I haven’t forgotten you; I promise! My Camera Mechanics is the secret to photography success with your DSLR or mirrorless camera!
And here’s a link to the case I’ve already ordered for my new iPhone 18 Pro Max. It’s made by Moment. I’ve used their cases for years! And I’m now a grateful affiliate of theirs, so I may get a small commission if you click and buy. And if you have a different iPhone model, click HERE to see all their cases!

You might also like