
Did you know that learning just three camera settings for creative control can help you capture the photos you’ve been imagining instead of leaving all the decisions up to your camera?
Have you ever taken a photo that didn’t turn out quite the way you imagined? Maybe you wanted a beautifully blurred background behind a flower, but everything in the photo was sharp. Or perhaps you tried to photograph your dog running across the yard, only to discover that your furry friend was a blur!
Here’s something you might not realize: Your camera probably has everything you need to take the photo you imagined. You just need to know which settings to use! If you’ve been leaving your DSLR or mirrorless camera on Auto, you’re letting the camera make all the creative decisions. And while Auto can be convenient, it can’t read your mind!
Today, I’m going to introduce you to three camera settings that can make an enormous difference in your photography: aperture, shutter speed, and ISO.
But before I do, if you’re reading this and thinking, “But I take all my photos with my iPhone!” don’t go away! The same photography principles apply whether you’re using an iPhone, a DSLR, or a mirrorless camera! And with the new iPhone 18 Pro and Pro Max offering more camera controls, there’s even more reason to understand how aperture and shutter speed affect your photos. You might be surprised by how much of what we’re going to explore applies to your iPhone photography, too!
Aperture: One of my favorite camera settings for creative control!
Imagine you’re photographing a beautiful flower in your garden. You want the flower to stand out, with the background softly blurred so nothing distracts from those gorgeous petals. But when you take the picture, everything is sharp. The flower, the fence behind it, and even the neighbor’s garden hose!
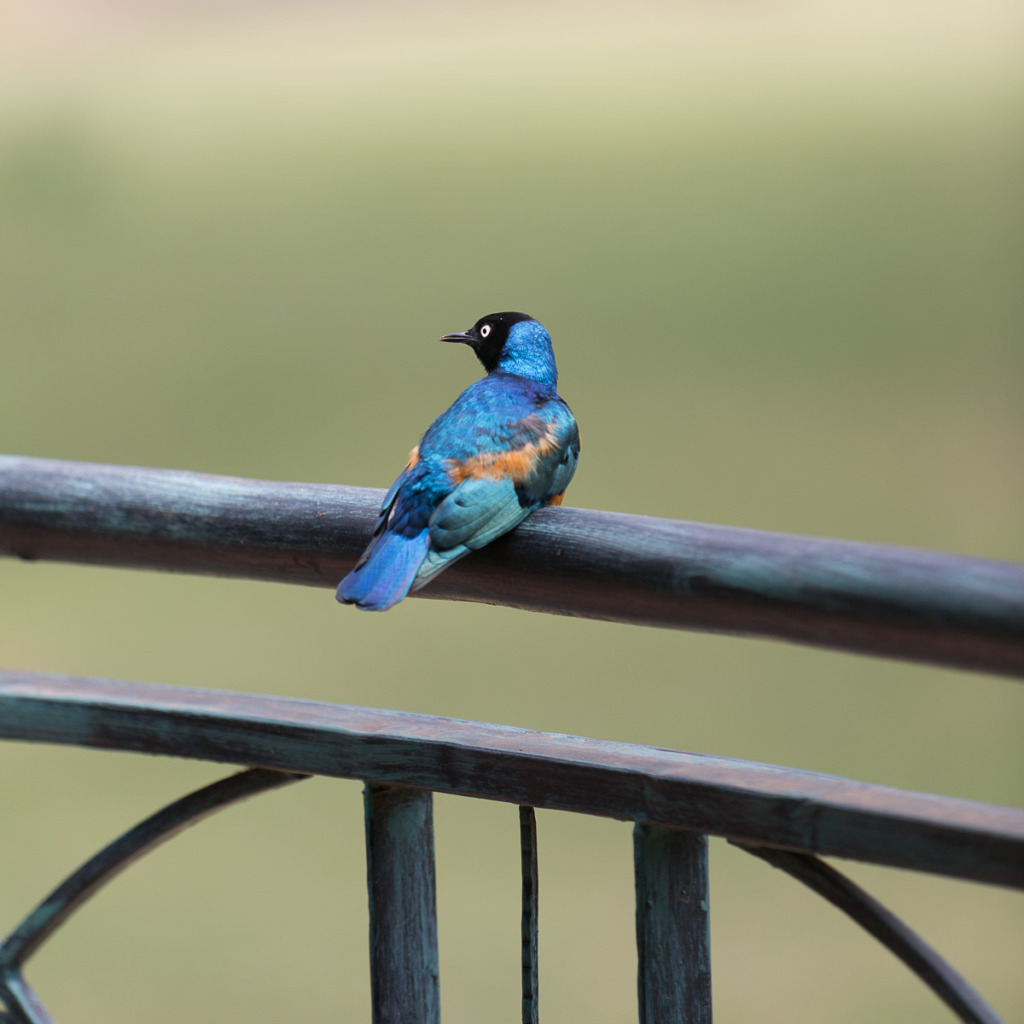
Or what about a small bird, like this Superb Starling in Naivasha, Kenya? It will disappear into the background if everything is in focus. The settings for this photo were f/2.8, 1/400 second, ISO 100,
This is where aperture comes in. Aperture is one of the camera settings that helps you take creative control of how much of your photo appears sharp. When you choose a wider aperture (a smaller f/stop number, like f/2.8), you can create that beautiful blurred background photographers call bokeh.
If you choose a narrower aperture (a larger f/stop number, like f/11), more of your scene will appear sharp. For this photo of Big Ben and the Houses of Parliament during the blue hour, I placed my Canon DSLR on a tripod and used the following settings: f/14, 4 seconds, ISO 100.
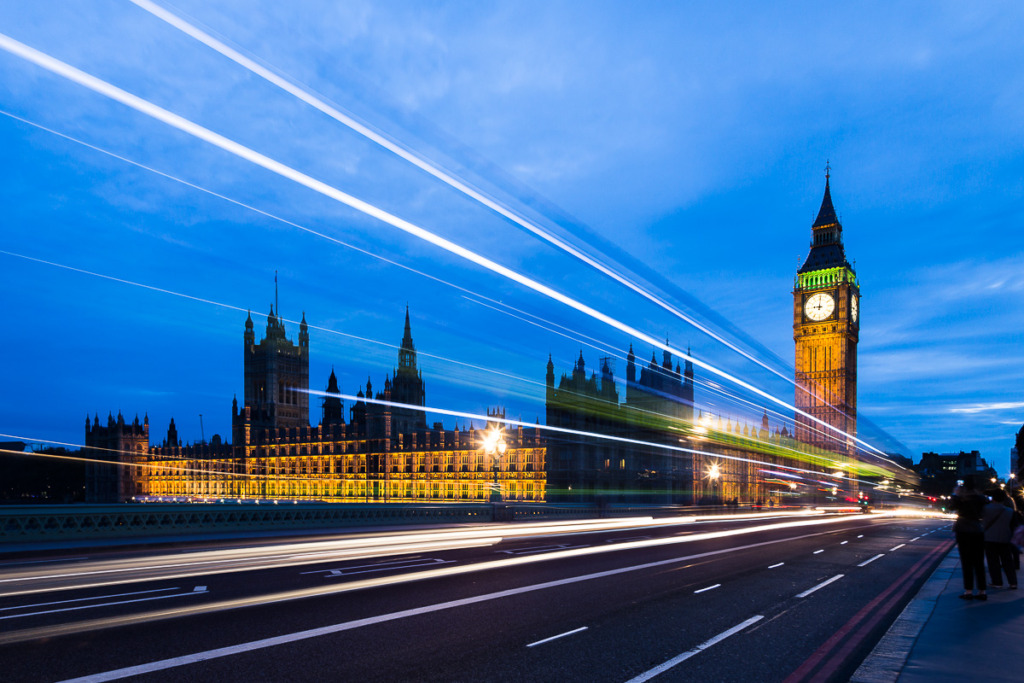
(If you’re shooting with a new iPhone 18 Pro or Pro Max, the numbers are different. Just remember that the lower numbers help produce the blur and the higher numbers allow more of your scene to be sharp.)
Now, just think of the possibilities! You might want a beautifully blurred background behind a portrait of your child. But when you’re photographing a spectacular landscape on vacation, you may want everything from the foreground to the distant mountains to appear sharp.
By choosing your aperture, the creative choice is yours!
Shutter Speed: The camera setting for creative control of movement
Have you ever tried to photograph someone jumping into a swimming pool? You pressed the shutter button at just the right moment, but when you looked at the picture, the person was blurry. Or perhaps you’ve photographed a waterfall and wished you could make the flowing water look soft and silky.
Both of these situations involve another important camera setting: shutter speed. When you’re learning about camera settings for creative control, shutter speed is especially exciting because it lets you decide how movement appears in your photographs. It controls how long your camera records the light coming through the lens.
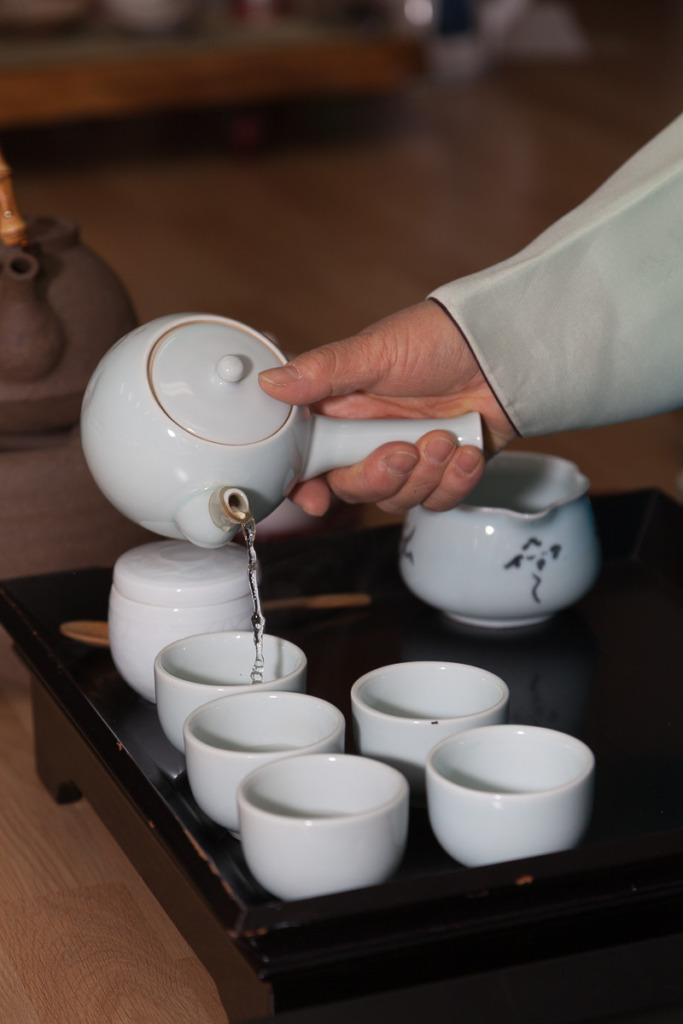
A fast shutter speed, such as 1/1000 of a second, can freeze a child jumping, a dog running, or a bird taking flight. (Unless your dog is a Boston Terrier… You might want to start at 1/2500 sec! 😉) This will even help when you’re shooting something a little slower! I set my Canon DSLR to f/5.0, 1/125 second, ISO 200 to freeze the movement during this tea ceremony in Seoul.
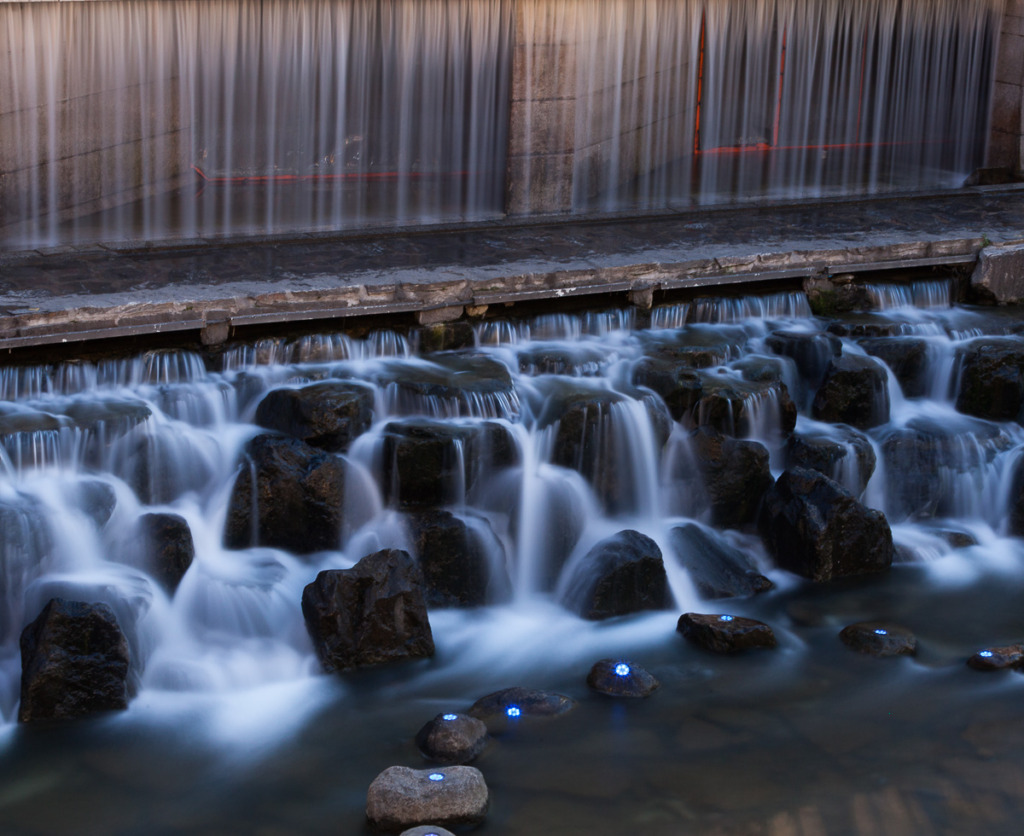
On the other hand, a slower shutter speed, such as a second or longer, can intentionally blur movement. Think about the beautiful, silky water you sometimes see in photographs of waterfalls.
And there’s an added benefit to that slow shutter speed! This photo is of the Samdakdong Water Screen along the Cheonggye Stream in Seoul. Believe it or not, it camouflages a drainage area along the stream where water from gutters enters. I love how the water becomes so silky. AND I love that 6 people walked along that sidewalk while I was taking the photo, and they totally disappeared! 👏 Canon DSLR settings: f/20, 30 seconds, ISO 400. Shot on a tripod.
Here’s what makes shutter speed so much fun: You get to decide whether to freeze the action or show the movement! And once you understand how shutter speed works, you’ll discover all sorts of creative possibilities.
ISO: The camera setting for creative control in low light
Now imagine you’re at a family birthday party. Everyone is gathered around the cake, the candles are glowing, and you’re ready to capture that wonderful moment when the birthday girl makes her wish. But the room is dim. So, when you take the photo, it’s blurry or much too dark.
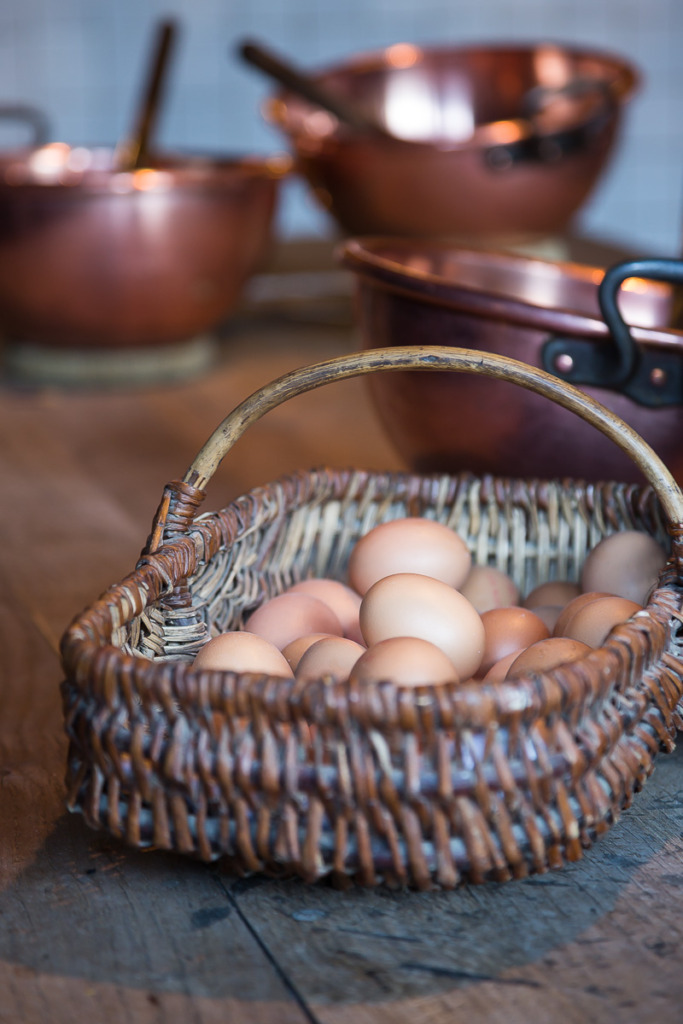
Or imagine you’re standing in the kitchen of L’Auberge La Mère Poulard in Le Mont Saint-Michel, France. In front of you is a basket full of eggs that will become one of their famous omelets. But the kitchen is poorly lit. (Settings: f/4.0, 1/25 second, ISO 500.) I did hand-hold this photo. I’m lucky to have very steady hands and a camera that has Image Stabilization. I always use it, unless I’m using a tripod.
This is where ISO can help. Of the three camera settings for creative control, ISO is the one that helps you adapt when the lighting isn’t ideal. It controls how sensitive your camera’s image sensor is to the light it receives—or, more precisely, how much the camera amplifies the signal from the sensor.
When there’s plenty of light, a low ISO setting, such as ISO 100, is usually a good choice. But when you’re photographing indoors or in the evening, increasing the ISO can help you get a properly exposed photo while keeping a shutter speed that’s fast enough to avoid blur.
So why not just set a higher ISO all the time? Higher ISO settings can introduce noise, which are those little speckles or grainy-looking areas you sometimes notice in photographs. Digital noise usually shows up in the darker parts of the image and reduces how sharp it looks. So, the goal is to set as low an ISO as you can.
But remember, a slightly noisy photo is much better than a blurry photograph of a moment you’ll never get back! And there is software you can use to reduce the noise when you edit the image, too! I’ll mention it at the bottom of this post.
Learning when to increase your ISO gives you another way to take control when the lighting isn’t ideal.
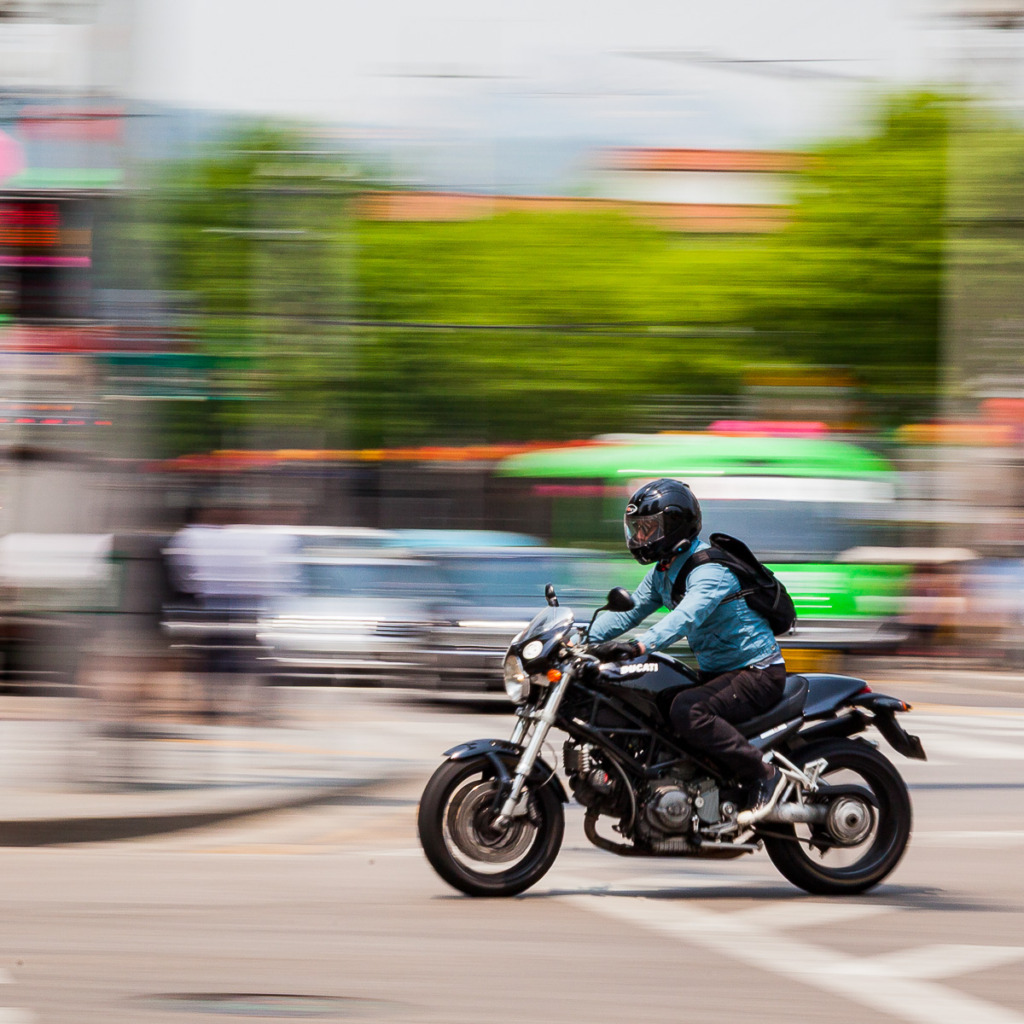
And learning to decrease it can come in handy, too. For the photo below, I wanted to use a panning technique to show the movement of the motorcycle. To pan, you set a slow shutter speed and then follow the moving object while you take the photo. Settings: f/22, 1/30 second, ISO 100.
Your Camera Has So Much More to Offer!
Here’s what I hope you’ll take away from these three camera settings. Aperture, shutter speed, and ISO aren’t just technical terms buried in your camera manual.
They’re creative tools!
- Aperture helps you decide how much of your photo appears sharp.
- Shutter speed lets you freeze action or intentionally show movement.
- ISO helps you work with different lighting conditions.
And here’s the really exciting part: Once you understand how these settings work together, you can stop wondering why your photos didn’t turn out the way you hoped. Instead, you can start making the creative decisions yourself!
Let’s Explore These Camera Settings Together!
Over the next few weeks, we’ll explore how to use these camera settings for creative control. We’ll start with Aperture Mode, where you’ll discover how to create those beautiful, softly blurred backgrounds that make your subject stand out. Then we’ll move on to Shutter Mode, where you’ll learn how to freeze action or intentionally blur movement for creative effect. And we’ll explore ISO, too, so you’ll feel more confident taking photographs when the lighting isn’t quite what you’d hoped for.
My goal is to help you discover that getting off Auto doesn’t have to be intimidating. You can learn one setting at a time, try it out, and gradually become more comfortable making your own creative decisions.
And don’t forget… with the newest iPhones, you can now set the aperture and shutter speed!
Now It’s Your Turn!
For this week, pay attention to the photos you’re taking and ask yourself one simple question: What do I want this photo to look like? Do you want a beautifully blurred background that makes your subject stand out? Would you like to freeze a moving subject in action? Or are you trying to capture a special moment when the lighting isn’t ideal?
Just start noticing how aperture, shutter speed, and ISO could help you capture the photo you’re imagining. Then stay tuned! Over the next few weeks, we’ll explore these settings one at a time, with simple tips you can try with your own camera.
Learn More About Camera Mechanics
And if you’re ready to jump right in with your DSLR or mirrorless camera, my Camera Mechanics Workshop is the answer you’ve been looking for! You can learn about it HERE.
Learn more about iPhone Photography Made Easy
And let’s not forget the iPhone! iPhone Photography Made Easy will speed up your learning curve! You’ll finally understand what all those settings actually do! You can learn about it HERE.
Learn More About Noise Reduction
Finally, I mentioned software that will help reduce digital noise. Here are three I recommend:
The Photos app which is free on iPhones, iPads and Macs includes noise reduction. You’ll find it when you tap on the Edit icon and then the Adjust icon. (And yes, you can edit your DSLR or mirrorless photos in the Photos app, too!)
My second favorite app for noise reduction and so much more is Topaz Photo. It is available with a subscription.
And of course there’s Adobe Lightroom. Yes, it’s also available with a subscription, but there is a free app!!! Download it to your mobile device. It doesn’t include all the bells and whistles, but it does include noise reduction! Click on the three horizontal lines with circles on them when you open a photo in the app. That will take you to edits. Now, click on the Detail icon. If the noise in your photo looks like black or gray pepper, you choose Noise (for Luminance). If you have colorful noise, choose Color Noise.
Quick software update… Adobe has just finalized its purchase of Topaz. I’m still using them separately. Not sure if they will be totally combined.
And remember, you don’t need the newest or most expensive camera to take wonderful photographs. You just need to understand the camera you already own. ❤️

You might also like

Leave a reply