
Understanding ISO in photography can make a big difference in how confidently you use your camera, especially when the lighting isn’t ideal.
Have you ever taken a photo indoors, only to discover that it was blurry or much too dark? Maybe you were photographing your children playing, enjoying dinner with friends, or visiting a beautiful museum. You could see everything perfectly well, but your camera seemed to struggle! That’s where ISO comes in.
Over the past few weeks, we’ve explored Aperture Mode and Shutter Mode. Now it’s time to meet the third member of the exposure triangle: ISO. The good news? You don’t need to memorize complicated formulas to understand it!
Here are three simple things to know about ISO that will help you take better photos.
Understanding ISO in Photography: What Does It Actually Do?
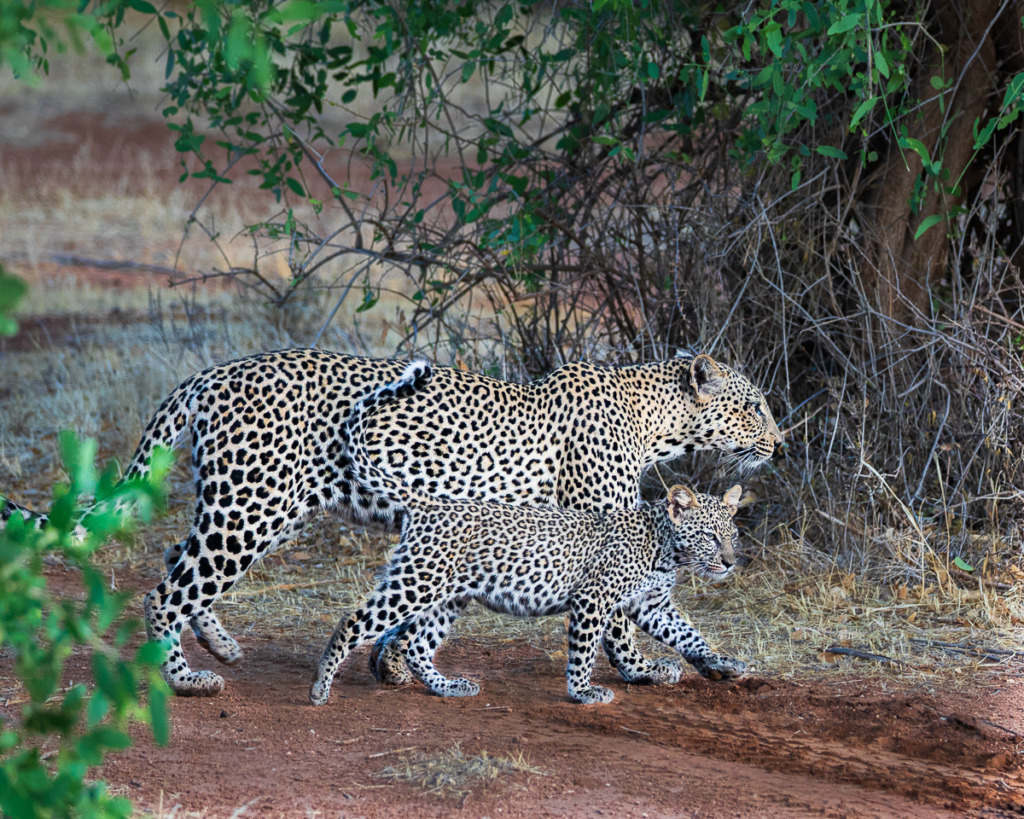
ISO can allow you to capture photos that otherwise wouldn’t be possible! Leopards (and a lot of other African animals) rise early. To capture a good image of them, you’re out searching long before dawn. But that means the light is low. To freeze this wonderful mother and her cub, I shot in Shutter Mode and set my ISO at 2500.
Think of ISO as a way to control how brightly your camera records an image.
Your camera has an image sensor that collects light. When you increase your ISO, your camera amplifies the signal from that sensor, making your photo brighter without needing additional light. Most cameras have a range of ISO settings, often starting at ISO 100 and going up into the thousands.
Here’s a simple way to think about it:
- Low ISO (100–200): Great when you have plenty of light, such as outdoors on a sunny day.
- Medium ISO (400–800): Useful when the light isn’t quite as bright, perhaps on a cloudy day or near a window.
- High ISO (1600 and above): Helpful when you’re photographing indoors or in other low-light situations.
Every time you double your ISO, you’re doubling the brightness produced by that setting, assuming your aperture and shutter speed stay the same. But here’s something important to remember: Raising your ISO doesn’t actually add more light to your camera. It makes better use of the light your sensor has already captured.
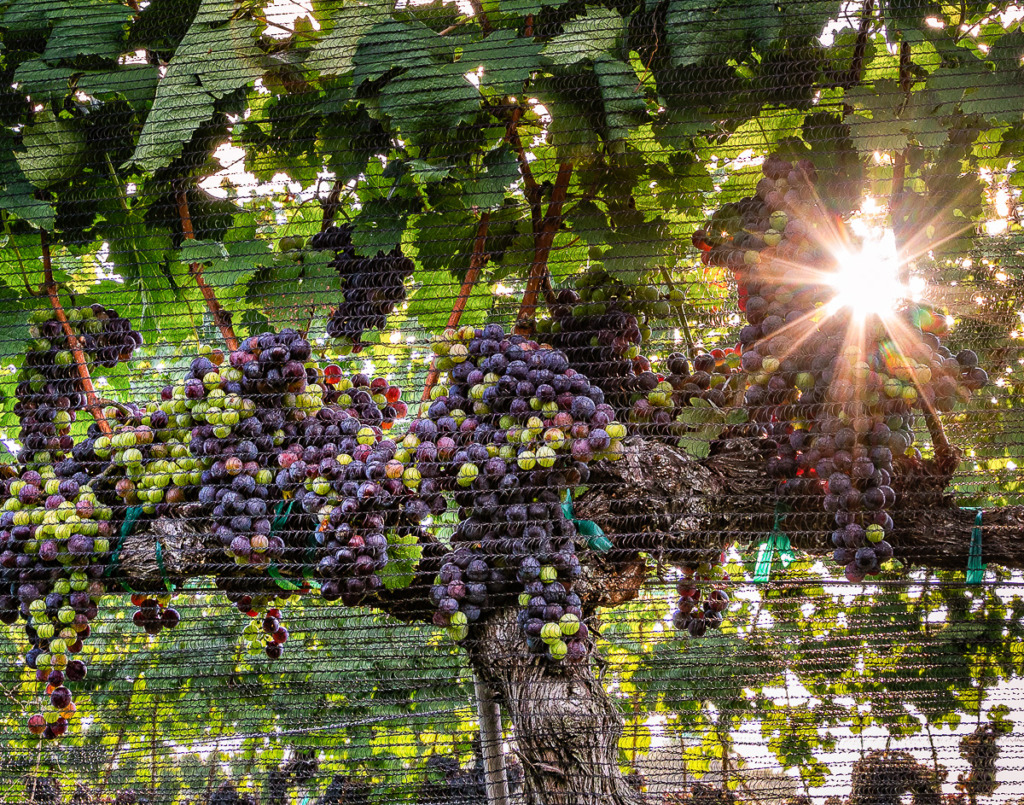
Sometimes, the photo you want to capture can be the culprit. I wanted to photograph these grapes on a vine at the Williamsburg Winery. And I wanted to include a sunburst to make it more exciting. That meant I had to shoot just before sunset, when the sun was low enough behind the vines. But to create a sunburst, you set a high aperture, which darkened this photo. So, I added 1.33 Exposure Compensation to brighten the photo.
Can you see where this is going? Every step adds another twist! I was shooting hand-held, but the shutter speed was now too slow! The solution? I raised the ISO to 400! The happy ending? I got the photo, which I sold at an event at the Winery!
And that brings us to the next tip!
Know When to Raise Your ISO
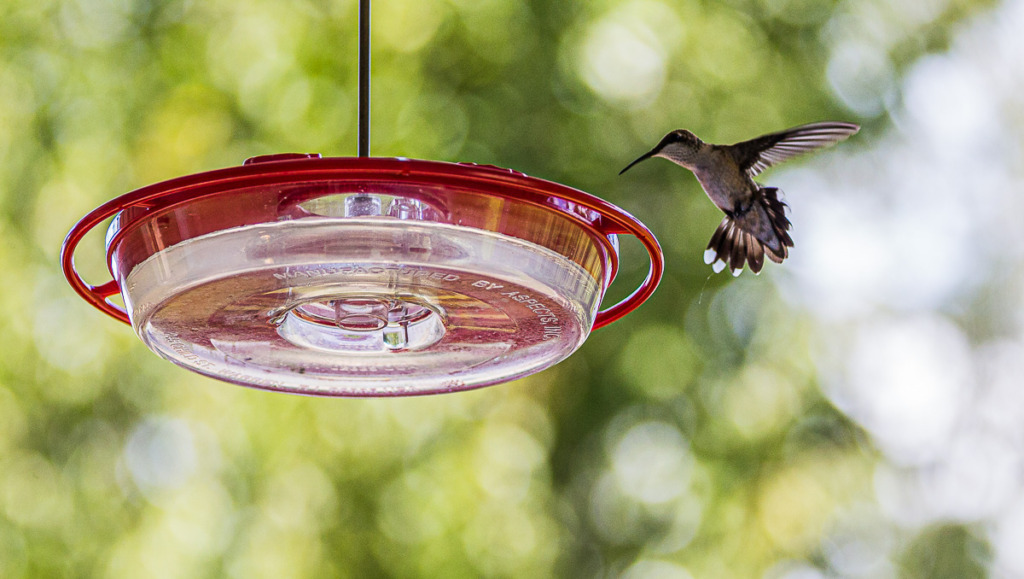
One of the most useful parts of understanding ISO in photography is knowing when to change it. The two photos in this section were backlit and taken in lower light. In case the term backlit isn’t familiar, it means the light is behind your subject. It can make it difficult to properly light your subject.
Now here’s the funny thing about hummingbirds. They love to feed early in the morning, when the light is low. And it’s hard to set a fast enough shutter speed to freeze them in the air in that low light! Honestly, it can drive you crazy! 😎
I shot this photo in Manual Mode using my 70-200 zoom lens with a 2X extender. Yes, these birds are tiny! The extender meant the lowest f/stop number I could use was f/5.6. That meant less light reaching the sensor. I knew I had to set a fast shutter speed… (1/1000 second), so ISO came to the rescue. I set it to 1600. Without that high ISO setting, this photo would be way too dark!
Now, imagine you’re photographing your child blowing out birthday candles. The room is dim, and you want to capture that wonderful expression as the candles go out. So, you take a photo, but it’s blurry. Why? Your camera may be using a slow shutter speed to gather enough light. And even a little movement can cause blur.
Again, this is where raising your ISO can help. By increasing your ISO, you can use a faster shutter speed while maintaining a similar brightness. That means you have a better chance of capturing the moment sharply!
The same idea applies when you’re photographing a school performance, a pet playing indoors, or people enjoying an evening together.
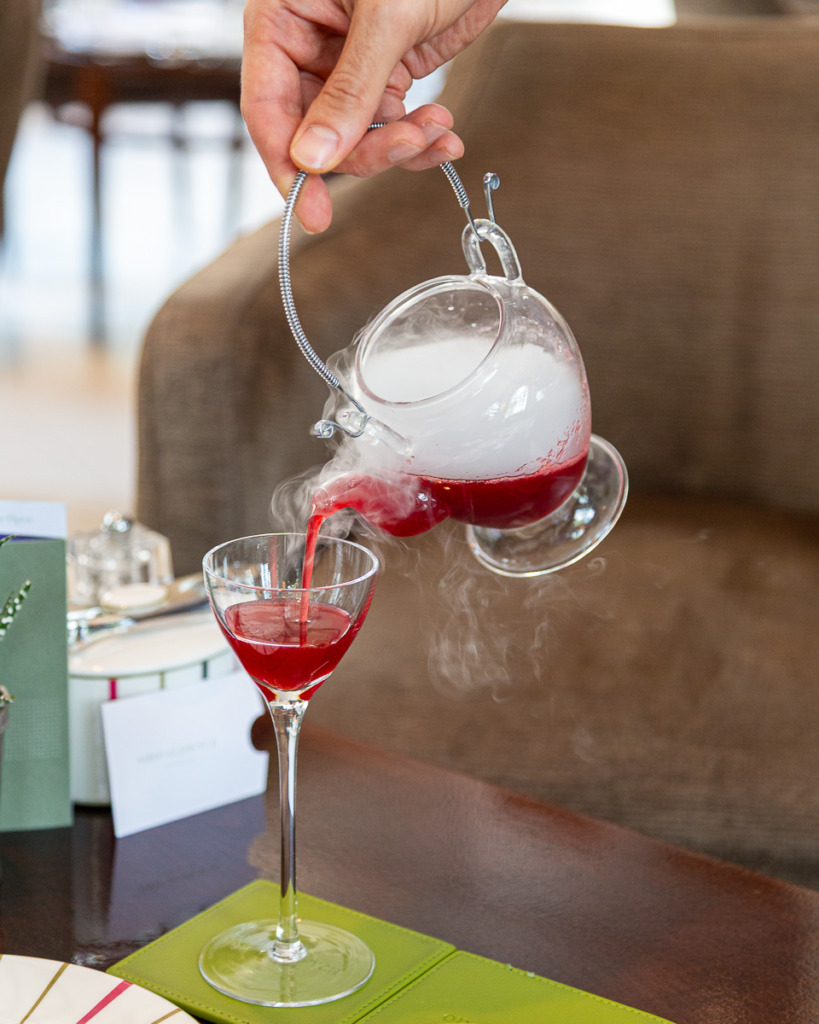
And not all birthday parties involve candles! I shot this smoky backlit photo at a Harry Potter Tea in London. My daughter and I were celebrating her 18th birthday. The light reflecting off the granite floor presented a challenge. I had to add 1 stop of Exposure Compensation to brighten the photo. I shot it in Aperture Mode, with an aperture of f/4, which would allow more light to reach the sensor. Then, in order to freeze the action, I set the ISO to 1600!
My insider tip: If you’re using Aperture Mode or Shutter Mode, try Auto ISO. Your camera can adjust ISO automatically as the lighting changes, leaving you free to concentrate on your subject. I use Auto ISO most of the time!
Just remember that Auto ISO works best when you’ve also paid attention to your shutter speed. You don’t want your camera choosing a shutter speed that’s too slow for your subject. Sometimes, you have to set the ISO. In the photo above, the camera simply didn’t know that I wanted that fast a shutter speed!
Don’t Be Afraid of a Little Noise
Here’s something I wish more photographers understood: A little noise in your photograph isn’t the end of the world!
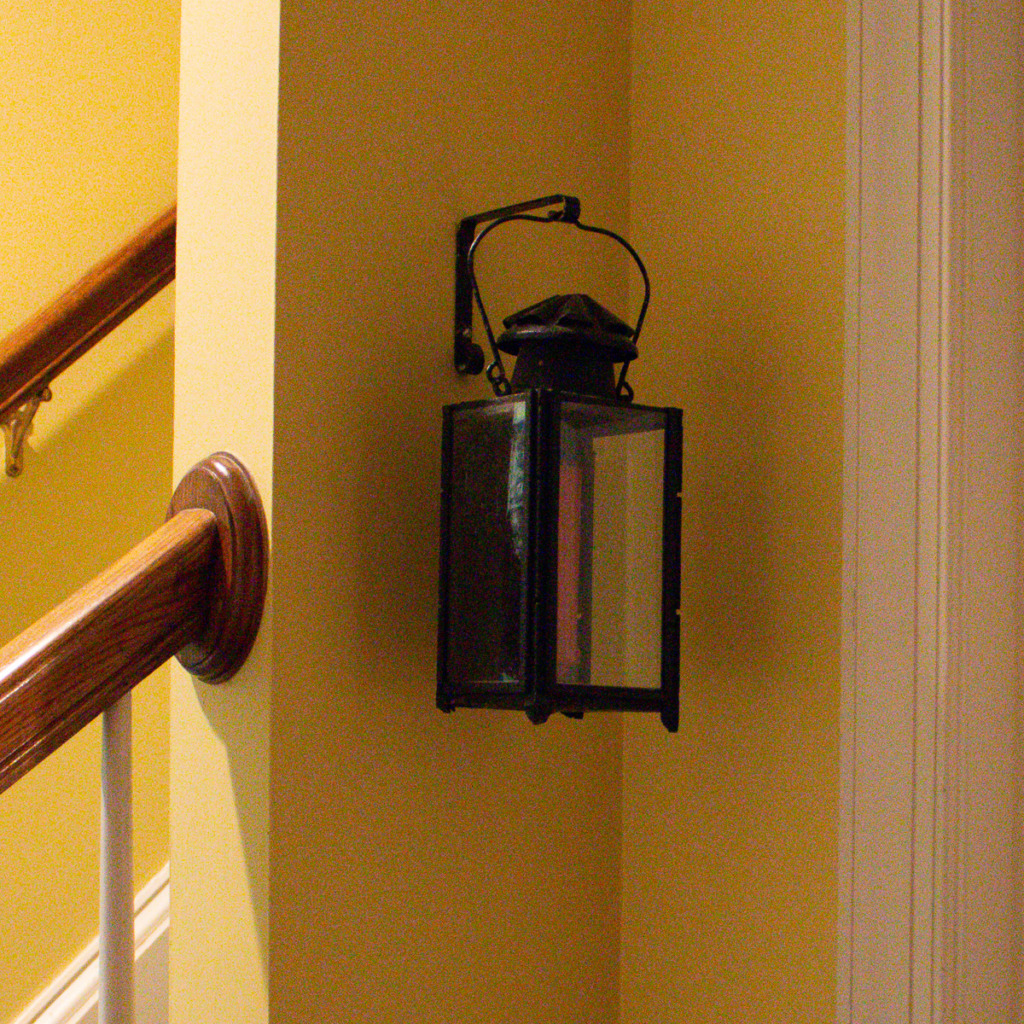
When you increase your ISO, you may notice tiny speckles or graininess in your photos, especially in darker areas. Photographers call this digital noise. And yes, we’d all love perfectly smooth, noise-free photographs. You can clearly see the noise in this photo of a lantern. I took it in our lower hallway to demonstrate digital noise. Most of the noise in this photo is Color Noise.
But think about this. Would you rather have a slightly grainy photograph of your child’s delighted expression as the birthday candles go out, or a perfectly smooth photograph that’s blurry because your shutter speed was too slow? I know which one I’d choose! 😉
Modern cameras handle higher ISO settings much better than older cameras did. And today’s photo-editing software can often reduce noise quite effectively. So don’t let the fear of noise stop you from raising your ISO when you need to.
My tip: If you’re setting your ISO, start with a low ISO when you have plenty of light. But when the light fades and you need a faster shutter speed, don’t hesitate to increase it.
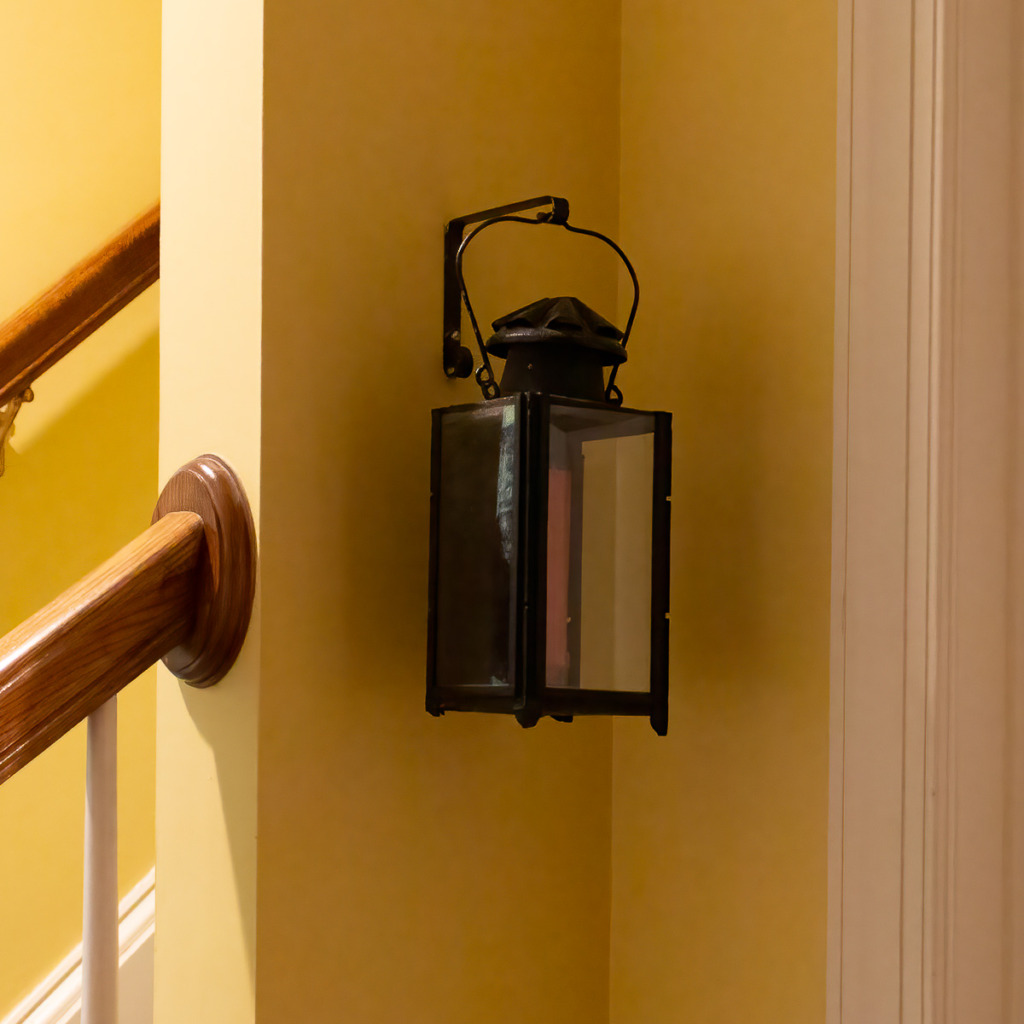
A sharp photograph with a little noise is often much better than a blurry one! Plus, editing software, including the Photos app on your iPhone, iPad or Mac, can do a good job of reducing the noise! I’ll mention another editing application that I swear by below. It’s called Topaz, and I used it to remove the noise from the lantern photo.
Now It’s Your Turn
This week, I’d love for you to try a little ISO experiment.
Find a subject indoors where the lighting isn’t especially bright. It could be a favorite coffee mug, a flower, or even someone sitting by a window.
Then, if your camera allows you to control ISO, take three photos using ISO 100, ISO 800, and ISO 3200. Keep your aperture and shutter speed the same, if possible.
Now compare your photos. What happens to the brightness? Can you see any difference in the noise? You may be surprised at how useful a higher ISO can be!
And remember, understanding ISO in photography is just one piece of the puzzle. When you know how ISO, aperture, and shutter speed work together, you gain so much more creative control over your photographs.
That’s exactly what I teach in my Camera Mechanics online workshop. If you’re ready to stop guessing at your camera settings and start taking photos with confidence, I’d love to help you!
And here’s the application I mentioned earlier. It’s called Topaz Photo and does an amazing job of noise reduction. It works on your computer, either Mac or PC. There’s also a version that is Cloud-based. I’ve used Topaz software since 2008! And, yes, I buy the whole Topaz suite, but Topaz Photo is plenty!

You might also like

Leave a reply